Custom Photo Golf Balls: Tips for Perfect Prints Every Time
Get perfect photo golf balls every time. Covers image resolution, cropping for curved surfaces, color correction, best subjects, and common mistakes to avoid.
Priya Shankar
Customer Success Lead at RareCustom. CCXP certified with 6 years in education. Priya helps customers achieve perfect photo prints on custom golf balls.
There is something genuinely magical about pulling a custom golf ball from your bag and seeing a loved one's face, a beloved pet, or a hilarious candid photo staring back at you from the ball's surface. Photo golf balls — also called picture golf balls or golf balls with picture — have become one of the most popular personalized gift categories in golf, combining emotional impact with practical on-course utility. But printing a photograph on a 1.68-inch sphere introduces unique technical challenges that can turn a treasured family portrait into an unrecognizable blur if the image is not properly prepared.
This guide covers everything you need to know to get perfect personalized photo golf ball prints every time — from image resolution requirements and curved-surface cropping techniques to color correction, subject selection, background removal, and proof approval. Whether you are ordering a single sleeve of dog photo golf balls for a friend or 10 dozen baby photo golf balls for a birth announcement, these tips ensure your photos look sharp, colorful, and instantly recognizable on the finished product.
What Makes Photo Golf Balls Special
Custom image golf balls occupy a unique space in personalized merchandise because they combine two things people love — photography and golf — into a single functional product. Unlike a framed photo that sits on a shelf or a phone case that gets replaced every year, a photo golf ball is used actively in a recreational setting that carries positive emotional associations. Every tee shot becomes a conversation starter. Every time the ball is retrieved from the cup, the photo triggers a smile or a story.
The emotional resonance of photo golf balls makes them ideal for occasions where sentiment matters more than practicality. Memorial golf balls honoring a deceased loved one allow golfers to carry that person's memory onto the course. Baby photo golf balls announce new arrivals to golfing friends and family. Retirement photo golf balls celebrate a career with a favorite portrait. Funny photo golf balls featuring embarrassing candids, meme-worthy expressions, or inside jokes make unforgettable gag gifts that recipients display proudly rather than use (which extends the gift's lifespan dramatically).
The technology behind photo golf balls is UV printing — the only method capable of reproducing full-color photographic imagery on a golf ball surface. UV inkjet printers apply CMYK (cyan, magenta, yellow, black) ink plus white base directly onto the ball, then cure the ink with ultraviolet light. The result is a full-color, photo-quality image that is durable, vibrant, and water-resistant. For a detailed comparison of UV printing versus traditional pad printing, read the beginner's guide to custom golf balls.
Image Resolution Requirements
Resolution is the single most critical factor in photo golf ball quality. The print area on a standard golf ball is approximately 25mm in diameter — less than one inch — which means the printer is compressing your image into a very small space. If the source image lacks sufficient pixel density, the printed result will appear soft, pixelated, or blurry. No amount of post-processing can add detail that was not in the original file.
The minimum resolution for acceptable photo quality golf ball results is 300 DPI at the final print size. For a 25mm (approximately 1-inch) print circle, that translates to a minimum of approximately 660 pixels across the image in both width and height. In practical terms, any photograph taken with a modern smartphone (which captures images at 3,000-12,000 pixels wide) exceeds this minimum by a factor of 5-20x — resolution is typically only a problem when using cropped images, social media downloads, or screenshots.
Higher resolution is always better. Submitting a high resolution golf ball image at 600+ DPI provides the print operator with more data to work with, allowing sharper edge definition and smoother tonal gradation. If your source image is 1,000+ pixels in each dimension before cropping, you are well above the minimum. The danger zone is images below 400 pixels in either dimension — these will produce visibly soft results on the finished ball.

Cropping and Composition for a Curved Surface
Printing on a sphere introduces curved surface photo printing challenges that do not exist in flat printing. On a flat surface, every part of the image appears at the same scale and perspective. On a golf ball, the image wraps around the curvature, causing elements near the edges of the print area to appear compressed, foreshortened, and slightly distorted. This golf ball image distortion effect is most noticeable with straight lines, geometric shapes, and text — less noticeable with organic subjects like faces, pets, and landscapes.
The most effective cropping strategy for golf ball photo crop optimization is to center the primary subject and leave generous padding around the edges. Crop the image into a circle (matching the print area shape) with the face, logo, or key element positioned dead-center. Allow at least 10-15% of the image area as a buffer zone between the subject's edges and the crop boundary. This buffer ensures that curvature distortion affects background elements rather than the primary subject.
For portrait photos, crop tight on the face — forehead to chin — rather than including shoulders and torso. A face filling 60-70% of the print circle produces the most recognizable result. Full-body shots or group photos rarely work well at golf ball scale because individual features become too small to identify. If the goal is to feature multiple people, consider ordering separate balls for each person rather than cramming everyone into a single image.
Vertical and horizontal orientation both work, but square or circular compositions translate most naturally to the round print area. Wide panoramic images will lose significant content on the left and right edges when cropped to a circle. Tall vertical images will lose the top and bottom. Always preview the cropped circular version of your image before submitting to catch any composition issues.

Color Considerations — Screen vs Print
One of the most frustrating experiences for photo golf ball buyers is receiving balls where the colors look different from what they saw on screen. This is not a printing error — it is a fundamental difference between how screens and printers reproduce color. Understanding the RGB to CMYK conversion process and managing expectations accordingly prevents disappointment.
Computer and phone screens display color using RGB (red, green, blue) light, which produces vivid, saturated colors by emitting light directly into your eyes. Printers, including UV golf ball printers, use CMYK color mode (cyan, magenta, yellow, black) ink, which produces color by absorbing and reflecting light — a subtractive process that inherently produces a narrower color range. Bright neon greens, electric blues, and vivid oranges that look stunning on screen will appear 10-20% less saturated in print. This color shift is universal to all printing, not specific to golf balls.
To minimize the screen-to-print color gap, slightly increase golf ball color saturation by 10-15% in your image editing software before submitting. Boost contrast slightly to ensure the image does not appear flat or washed out when printed at small scale. Pay attention to golf ball white balance — images with a warm (yellowish) or cool (bluish) color cast will carry that cast into the print. Correcting white balance before submission ensures skin tones look natural and whites appear clean on the ball's surface.
The white golf ball surface itself acts as the "white" in the printed image. Areas of the photo that are white or near-white will show the ball's natural surface, including dimple texture. This is generally desirable and expected, but if your image has important detail in very light areas, those details may be lost against the white ball surface. Darkening highlights slightly can preserve detail in light-toned areas.

Best Photo Subjects for Golf Balls
Not all photographs translate equally well to the golf ball format. The small print area, curved surface, and dimple texture favor certain subjects over others. Here are the categories that consistently produce the best personalized photo golf ball results, ranked by print quality and visual impact.
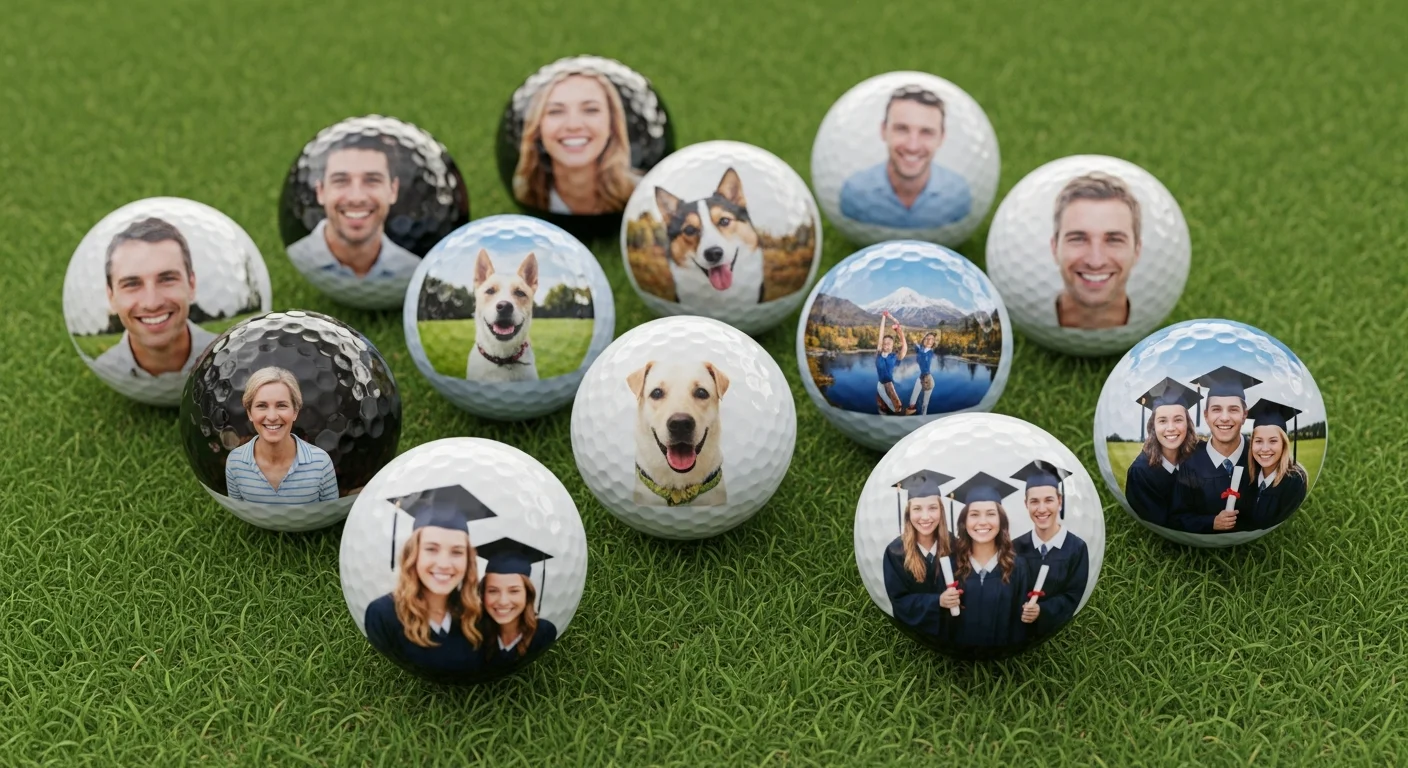
Faces and portraits: Close-cropped facial portraits are the #1 subject for photo golf balls. The human brain is hardwired to recognize faces even at small sizes and low detail levels, which means a face printed on a golf ball remains instantly recognizable. For best results, use a well-lit photo with the face filling 60-70% of the frame, clear eye contact, and a simple background. A golf ball face print with strong lighting contrast produces sharper, more dramatic results than a flat, evenly lit snapshot.
Pets: Dog photo golf balls and pet photo golf balls are the second most popular category. Close-up shots of pets' faces work best — capture the eyes, nose, and distinctive markings in high contrast. Darker-furred pets (black dogs, dark cats) may need brightness adjustment to ensure features are distinguishable against the CMYK print. Light-colored pets on white backgrounds may need a subtle color background to define edges.
Landscapes and scenery: A favorite golf course vista, vacation memory, or hometown skyline can create a beautiful, painterly effect on a golf ball. Choose images with strong color contrast and avoid scenes that rely on fine detail — a sweeping sunset works better than a detailed cityscape. Landscapes work particularly well as golf ball keepsake gifts commemorating a golf trip or destination round.
Humorous images: Funny photo golf balls featuring unflattering candids, meme-worthy expressions, photobombs, or inside-joke images are the most shareable and conversation-starting custom ball category. The humor translates well at small scale because the viewer is already primed to look closely and react. These make exceptional golf ball gag gifts for birthdays, bachelor parties, and fantasy football loser prizes.
Babies and children: Baby photo golf balls announcing births, featuring milestone photos, or commemorating a child's first year are perennially popular. Use high-contrast, well-lit images where the baby's face is the clear focal point. Avoid busy backgrounds that compete with the subject at small print scale.

Background Removal and Enhancement
Background removal golf ball processing is one of the most impactful preparation steps for photo golf ball quality. A cluttered or distracting background competes with the primary subject at the small print scale, making the image harder to read at a glance. Removing the background and replacing it with a solid color, transparent fill, or simple gradient isolates the subject and dramatically improves recognition.
For portraits and pet photos, remove the background entirely and replace it with a solid color that contrasts with the subject. A navy blue, forest green, or maroon background works well behind most skin tones and fur colors. Avoid white backgrounds — since the golf ball itself is white, a white background makes the printed subject appear to float formlessly on the ball surface with no defined boundary.
Basic photo editing golf ball enhancements that improve print results include: increasing sharpness by 15-25% (small print benefits from slightly over-sharpened source images), boosting saturation by 10-15% to compensate for the CMYK conversion loss, adjusting contrast to ensure the darkest tones are true black and the brightest tones are not blown out, and correcting any color cast or white balance issues. Most smartphone photo editors (including the built-in editors on iOS and Android) can perform all of these adjustments in under two minutes.
If the image includes text overlay (a date, name, or message incorporated into the photo), ensure the text is at least 14-point equivalent when printed at the 25mm scale. Smaller text may be illegible after printing. Bold, sans-serif fonts reproduce most clearly on the dimpled surface. For extensive text personalization, consider separating the text onto the ball's opposite pole using two-pole printing rather than embedding it in the photograph.
Previewing Your Design — Mockups and Proofs
Before committing to production, always preview your photo on a golf ball mockup preview that simulates the curved surface, dimple texture, and CMYK color space. Reputable providers offer a real-time golf ball mockup tool that wraps your uploaded image around a 3D ball rendering, showing approximately how the finished product will look from multiple angles.
The mockup is valuable but not pixel-perfect. It approximates curvature distortion and color rendering, but cannot perfectly simulate ink behavior on the actual ball cover material or the visual effect of ink in dimple cavities. For this reason, the proof approval photo golf ball step is essential — after mockup review, request a formal digital proof that represents the print operator's output intent. Review the proof on a calibrated monitor (or at minimum, compare it against a known color reference) to assess color accuracy.
For first-time orders or high-stakes gifts, consider ordering a single-ball or single-sleeve sample before committing to the full quantity. A physical sample eliminates all guesswork — you can evaluate print sharpness, color accuracy, dimple interaction, and overall visual impact in person. The cost of one sample sleeve ($10-$25) is trivial compared to the cost of reprinting a full order that does not meet expectations.
Review the golf ball print area dimensions on the mockup carefully. Ensure that no critical elements (eyes, text, key features) extend beyond the printable circle. Elements that approach the edge of the print boundary may be slightly truncated or distorted by curvature. Keep all important content within the inner 85% of the print circle for the safest results.
Common Photo Golf Ball Mistakes (and How to Fix Them)
Years of producing custom image golf balls have revealed a consistent set of mistakes that first-time buyers make. Each is entirely preventable with proper preparation.
Mistake #1: Using social media downloads as source images. Instagram, Facebook, and Twitter compress images aggressively to reduce file sizes. A photo that looks great in your feed may be only 600-800 pixels wide after platform compression — below the minimum for sharp golf ball printing. Fix: Always use the original full-resolution photo from your phone or camera, not a downloaded social media version.
Mistake #2: Submitting uncropped images. Full-frame photos with excessive background force the printer to scale the subject down to fit the circular print area, making faces tiny and features indistinguishable. Fix: Pre-crop the image to a square or circle with the subject filling at least 60% of the frame. Tight crops produce dramatically better results on golf balls.
Mistake #3: Expecting screen-accurate colors. Vibrant RGB colors will shift in CMYK printing. Neon greens become olive, electric blues become darker, and vivid oranges lose pop. Fix: Boost saturation 10-15% before submission and accept that some color shift is inherent in all photographic printing. Compare proofs carefully before approving.
Mistake #4: Including small text in the image. Names, dates, and captions embedded in photos often become illegible at golf ball scale. Fix: Remove text from the photo and add it separately as a dedicated text element on the opposite pole, or ensure text is bold, large, and high-contrast if it must remain within the image.
Mistake #5: Choosing a dark or low-contrast subject on a dark background. A black dog on a dark green background, or a dark-skinned subject in shadows, may lose definition and appear as a dark blob on the ball. Fix: Ensure strong contrast between subject and background. Use background removal to place the subject against a lighter or contrasting solid color.

Photo Golf Ball Ideas for Every Occasion
The versatility of personalized photo golf balls means there is a perfect photo concept for every gift-giving moment. Here are proven ideas organized by occasion that consistently produce the best results and strongest emotional reactions.
Father's Day and birthdays: Kids' or grandkids' faces (individual balls per child), a favorite family photo, the recipient's own "action shot" swing photo, or a humorous candid that only family would appreciate. Family photo golf balls are the most-ordered category for Father's Day, with orders spiking 300%+ in the two weeks before the holiday.
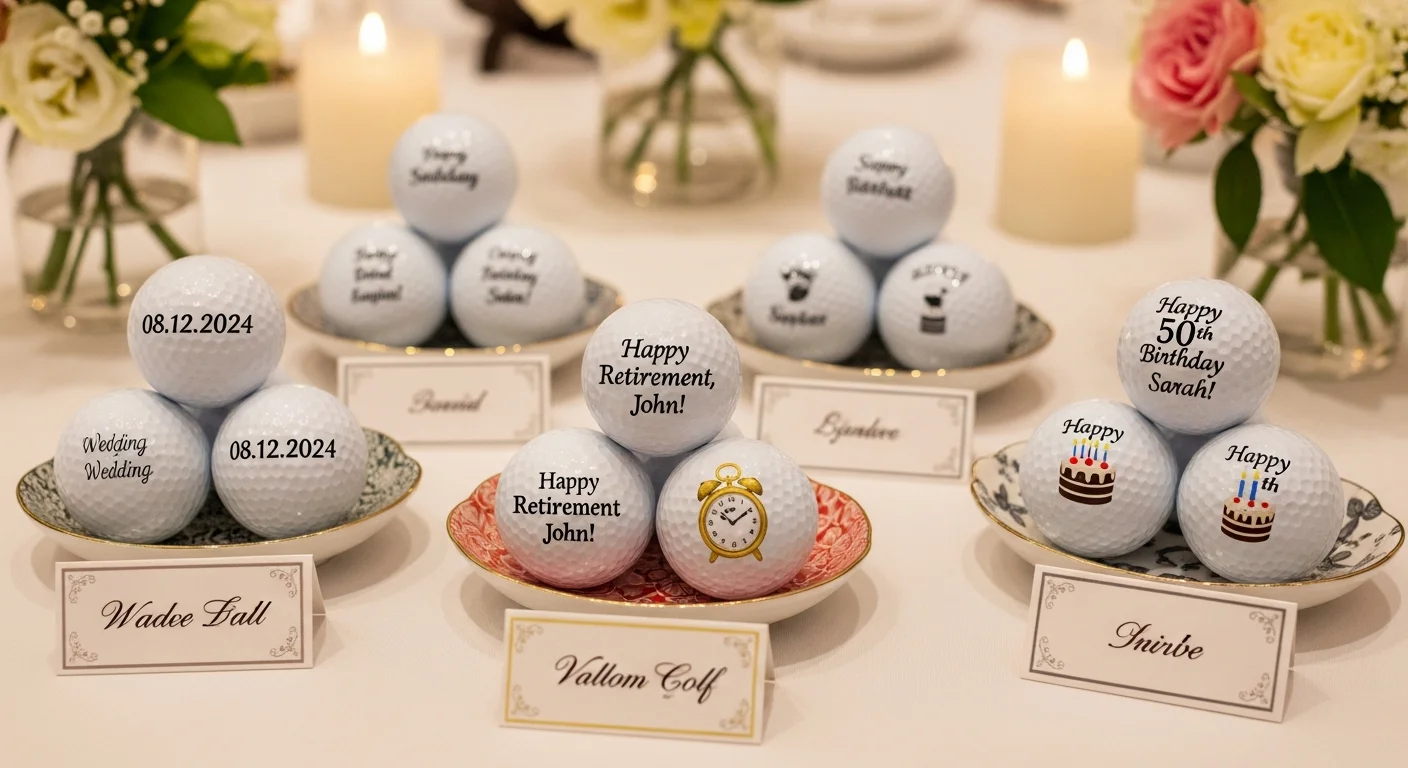
Weddings: Engagement photos for groomsmen gifts, couple portraits for guest favors, wedding date typography overlaid on a photo, or individual bridal party headshots for each attendee. Wedding photo golf balls work as both ceremony keepsakes and bachelor/bachelorette party favors. For more wedding-specific ideas, see the weddings and special events guide.
Retirement: Career highlights, office group photo, years-of-service milestones, or a humorous "gone fishing" (or "gone golfing") portrait. Retirement photo golf balls are often ordered by colleagues as a group gift, with each ball in the dozen featuring a different memorable photo from the retiree's career.
Memorials: A favorite portrait of the deceased, a photo from a shared golf outing, or an image that captures their personality. Memorial golf balls allow the golfer to carry a tangible reminder of their loved one onto the course — many recipients describe these as their most meaningful personalized gift.
Gag gifts and humor: Embarrassing photos, unflattering selfies, photobombs, pets in costumes, or any image guaranteed to make the recipient laugh out loud on the tee box. Funny photo golf balls and golf ball gag gifts are the most shared on social media, often generating organic brand exposure when recipients post their reactions.
Anniversary gifts: Photos from the wedding day, recent couples' portraits, or a progression of photos across the years of the relationship. Golf ball anniversary gifts with different photos on each ball in a dozen create a visual timeline of the relationship that golfer-couples display and use on the course together.
Order Custom Photo Golf Balls
Ready to turn your favorite photo into a custom golf ball that sparks joy on every tee box? RareCustom's free online design tool makes it effortless — upload your photo, see it on a realistic 3D golf ball mockup, adjust cropping and positioning, and order in minutes. Every photo golf ball order includes a free digital proof for your approval before printing begins. No minimum order requirements mean you can order as few as 3 balls (one sleeve) for a personal gift or hundreds for an event.
For best results, follow the image preparation tips in this guide: submit photos at 300 DPI or higher resolution, crop tight on faces, boost saturation by 10-15%, remove busy backgrounds, and review the mockup and proof carefully before approving production. With proper preparation, your personalized photo golf balls will look sharp, colorful, and instantly recognizable — exactly the way you envisioned them. For general design guidance that applies to all customization types, visit the best logo and text design tips guide.
Related Articles
Share this article
Written by
Priya Shankar
Customer Success Lead at RareCustom. CCXP certified with 6 years in education. Priya helps customers achieve perfect photo prints on custom golf balls.