Custom Photo Tumblers: Expert Tips for Perfect Photo Prints Every Time
Master photo tumbler printing with expert tips on resolution, layout, color correction, and cropping for tapered surfaces — everything you need for flawless personalized photo tumblers.
Priya Shankar
Customer Success Lead at RareCustom. CCXP certified with 6 years in education. Priya helps customers create perfect personalized photo tumblers for gifts and keepsakes.
A personalized photo tumbler transforms an ordinary piece of drinkware into a meaningful keepsake that someone carries everywhere — to the office, on road trips, to the gym, and through their daily routines. Photo tumblers consistently rank among the most-ordered custom drinkware products because they combine practical daily utility with deep personal significance. A family photo tumbler on someone's desk generates smiles every time they reach for a sip, a pet photo tumbler in a car cupholder keeps a beloved companion close during commutes, and a memorial photo tumbler preserves cherished memories in a form that becomes part of everyday life rather than sitting in a drawer.
However, the difference between a stunning photo tumbler and a disappointing one comes down to preparation. Unlike printing on flat surfaces such as custom mugs or custom stickers, photo tumbler printing involves wrapping an image around a tapered cylindrical surface, which introduces unique challenges in resolution, cropping, color accuracy, and distortion correction. This guide covers every technical detail you need to produce a perfect picture tumbler gift — from selecting the right source photo to final color correction — so every custom photo tumbler you order arrives looking exactly as you intended.
Why Photo Tumblers Make the Best Personalized Gifts
Photo tumblers occupy a unique position in the personalized gift market because they combine emotional value with daily utility. A framed photo sits on a shelf and is glanced at occasionally; a photo tumbler is picked up, held, and looked at multiple times every day. This constant interaction creates a deeper connection to the image and the memory it represents, making photo tumblers one of the most meaningful gifts for occasions like birthdays, anniversaries, Mother's Day, Father's Day, graduations, and memorials.
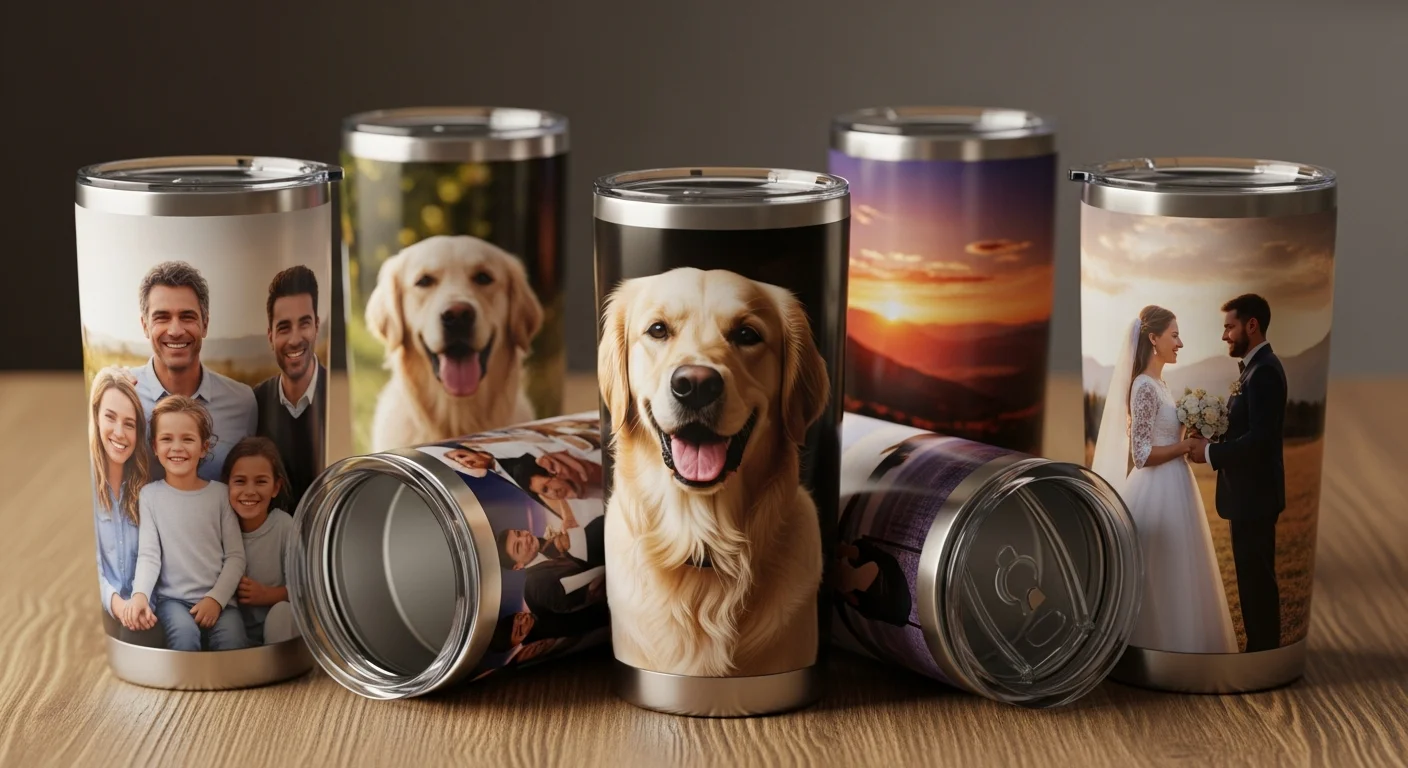
The versatility of personalized photo gifts extends across nearly every gifting scenario. A family photo tumbler featuring a multi-generation group portrait makes a perfect holiday gift for grandparents. A pet photo tumbler with a high-resolution portrait of a beloved dog, cat, or other pet is consistently one of the top-selling custom drinkware designs. Landscape photo tumblers featuring travel photography, beach sunsets, or mountain vistas appeal to outdoor enthusiasts and travelers. And memorial photo tumblers — tribute tumblers and in-memory drinkware featuring photos of loved ones who have passed — provide a daily source of comfort and connection that traditional memorial items cannot match.
From a practical standpoint, photo tumblers are among the easiest personalized gifts to order because they do not involve sizing (unlike custom hoodies or jerseys), they ship without fragility concerns (stainless steel tumblers are virtually unbreakable), and they are universally useful regardless of the recipient's age, gender, or lifestyle. The perceived retail value of $25 to $40 for a quality stainless steel photo tumbler also hits the sweet spot for gift-giving — substantial enough to feel special but not so expensive that it creates an awkward reciprocity dynamic. For gift-specific photo tumbler ideas, see the holiday and seasonal gift tumbler guide.
Photo Resolution Requirements
Resolution is the single most important factor in photo tumbler printing quality, and it is the number-one reason photo tumblers turn out poorly when beginners do not understand the requirements. The standard for high-quality tumbler photo printing is 300 DPI (dots per inch) at the final print size. For a 20oz skinny tumbler with a full-wrap print area of approximately 9.2 x 8.2 inches, this means the source image should be at least 2,760 x 2,460 pixels. For a 30oz classic tumbler with a larger circumference, the required dimensions increase to approximately 3,150 x 2,700 pixels for a full-wrap high-resolution photo wrap.
Most modern smartphones capture photos well above these thresholds — an iPhone photo tumbler project using a photo from any iPhone model released in the past five years will typically have more than enough resolution. The iPhone 15 captures at 4,032 x 3,024 pixels (48 megapixels), providing ample resolution even after cropping. However, smartphone photo quality degrades significantly when images are downloaded from social media platforms, messaging apps, or email. Instagram compresses images to approximately 1,080 pixels wide, Facebook reduces quality to 2,048 pixels on the longest side, and WhatsApp aggressively compresses images to under 1 megapixel. Always use the original file from the phone's photo library rather than a version that has been shared through social media or messaging.
To check an image's resolution before uploading, view the file properties on your computer or phone. On most devices, right-clicking the file and selecting "Properties" or "Get Info" reveals the pixel dimensions. If the image is below the recommended threshold, consider using photo enhancement tools to improve clarity — though no software can add detail that was not captured by the camera, upscaling algorithms can smooth pixelation enough to make borderline images usable for tumbler printing. As a rule of thumb: if the photo looks sharp when displayed full-screen on a laptop, it likely has sufficient resolution for 300 DPI tumbler printing.

Choosing the Right Photo Layout
The layout determines how photos are arranged on the tumbler surface, and the right choice depends on the number of photos, the design intent, and the tumbler size. The three most popular layouts are single hero image, photo collage, and full-wrap panoramic.
A single hero image features one large photo that dominates the tumbler's primary viewing face. This layout works best for high-impact portraits, dramatic landscapes, and images with a clear focal point. The photo is typically centered on the front of the tumbler with optional text (a name, date, or short message) above or below. Single-image layouts are the simplest to prepare and produce the most striking visual impact for high-quality photos.
A photo collage tumbler arranges multiple images on the tumbler surface, typically in a grid pattern, overlapping arrangement, or scattered photo-album style. A multi-photo tumbler layout is ideal for commemorating events (wedding day, vacation, family reunion), presenting a "year in review" collection, or creating a mosaic tumbler design from many small photos. Collage layouts for a 20oz tumbler typically accommodate 4 to 8 photos depending on arrangement style, while a 30oz tumbler can hold 6 to 12 images. Each photo in a collage requires proportionally less resolution because it occupies a smaller area of the print surface, but every image should still be at least 150 DPI at its printed size to maintain acceptable sharpness.
A full-wrap panoramic layout covers the entire 360-degree surface of the tumbler with a single seamless photo wrap. This is the most visually dramatic option — a 360-degree photo tumbler with a beach sunset, mountain landscape, or cityscape that wraps completely around the tumbler creates a stunning, immersive effect. The challenge is finding or creating an image wide enough to cover the full circumference without visible repetition or awkward cropping. Panoramic photos shot in "pano" mode on a smartphone often work well for this purpose. For a seamless photo wrap, the left and right edges of the image must align cleanly where they meet on the tumbler's seam line.

Cropping Photos for Tapered Surfaces
The most technically challenging aspect of photo tumbler preparation is accounting for the tapered shape that most tumblers have. Unlike a straight cylinder (like a standard mug), tumblers taper from a wider opening at the top to a narrower base at the bottom. When a rectangular image is wrapped around this tapered surface, the top portion of the image stretches to cover the wider circumference while the bottom portion compresses to fit the narrower circumference. This photo cropping for tapered surface challenge is unique to tumbler printing and does not apply to flat or cylindrical products.
Professional wrap templates account for this taper by providing a trapezoidal canvas rather than a rectangle — the template is wider at the top and narrower at the bottom, pre-compensating for the distortion correction so that the image prints correctly on the curved surface. RareCustom's design tool applies this distortion correction automatically when you upload a photo, but if you are preparing artwork externally, it is essential to download and use the official wrap template for the specific tumbler size. Without the template, faces may appear vertically stretched, text may be illegible at the base, and geometric patterns will look visibly warped.
When cropping photos for a tapered tumbler, place the most important elements (faces, text, focal points) in the upper two-thirds of the design area. This region corresponds to the widest part of the tumbler and experiences the least distortion. The bottom third, which wraps around the narrower base, compresses horizontal elements slightly and is partially obscured when the tumbler sits on a flat surface. Avoid placing critical details within 0.25 inches of the top rim (which will be covered by the lid) or the bottom edge (which curves under the base).

Color Correction for Tumbler Printing
The colors in a finished photo tumbler will not look exactly like the colors on a computer monitor unless the source image is properly prepared for the specific printing process. Color correction for tumbler printing involves adjusting the image to compensate for the differences between on-screen color display (which uses light-emitting RGB) and printed color output (which uses reflective inks).
For sublimation printing (the most common method for photo tumblers on white-coated blanks), the key adjustment is saturation for sublimation. Sublimation inks produce slightly less saturated results than what appears on screen, so increasing the image saturation by 10 to 15 percent before uploading compensates for this shift. Contrast adjustment is also recommended — slightly boosting contrast ensures that mid-tones and shadows maintain definition after the heat-transfer process. Avoid over-saturating reds and oranges, which tend to shift more dramatically than blues and greens during sublimation.
For UV printing, the color conversion from RGB vs CMYK tumbler color spaces is the primary concern. Computer screens display in RGB (Red, Green, Blue), while UV printers use CMYK (Cyan, Magenta, Yellow, Black) inks. Certain colors that appear vivid in RGB — particularly bright neon greens, electric blues, and hot pinks — cannot be precisely reproduced in CMYK and will appear slightly muted in the printed result. Professional designers perform a color calibration by converting the image to CMYK in photo editing software and reviewing the on-screen preview before submitting for print. RareCustom's design tool performs this conversion automatically and provides a color-calibrated preview, but for critical color accuracy, request a physical sample before ordering the full batch.

Full-Wrap vs Single-Side Photo Printing
The choice between a full-wrap photo tumbler and a single-side print determines both the visual impact and the preparation complexity of the project. A full-wrap 360-degree photo tumbler covers the entire circumference of the tumbler with a seamless image, creating a panoramic effect that is visible from every angle. This layout is best suited for landscape photographs, repeating patterns, abstract designs, and images that do not have a specific "front" orientation.
Full-wrap printing requires a source image that is wide enough to span the entire circumference — approximately 9 to 11 inches depending on the tumbler size — without noticeable repetition or stretching. The seam line where the two edges of the wrap meet is the most critical area to check: the left edge and right edge of the image must align perfectly in color, pattern, and brightness to avoid a visible line on the finished tumbler. Using a seamless photo wrap with naturally flowing content (sky, water, foliage, abstract gradients) minimizes seam visibility.
Single-side printing places the design on one face of the tumbler (typically the front), leaving the back blank or with a simple secondary design such as a name or date. This layout is simpler to prepare, uses less ink, and is slightly less expensive than a full wrap. It works well for portrait-oriented photos, centered logos with text, and designs where a clear "front face" is desirable. Single-side prints are also easier to correct if a design element is off-center, since adjustments only affect one area of the tumbler surface.
Photo Enhancement Tips Before Printing
Even high-resolution photos benefit from a few adjustments before submitting them for photo tumbler printing. Photo editing for print focuses on optimizing the image for the specific characteristics of the printing process and the tumbler surface.
Contrast adjustment is the most universally beneficial enhancement. Increasing contrast by 10 to 20 percent ensures that the distinction between light and dark areas remains clear after printing. Printed images tend to lose contrast compared to on-screen display, especially in mid-tone regions where subtle details can merge into a flat appearance. Boosting contrast preserves depth and dimensionality in the finished print.
Sharpening should be applied conservatively — a light unsharp mask or smart sharpen filter at 50 to 75 percent strength enhances fine details (hair, textures, edges) without introducing visible artifacts. Over-sharpening creates halo effects around edges that are more noticeable on a curved tumbler surface than on flat prints. Noise reduction is important for photos taken in low light, as the grainy texture of high-ISO images becomes more pronounced when enlarged for tumbler printing. Photo enhancement tools available in free software like GIMP and phone apps like Snapseed can handle all of these adjustments without requiring professional design skills.
For pet photo tumblers and family photo tumblers, consider adjusting the background brightness and removing distracting background elements. A busy background can compete with the subject for attention on the relatively small tumbler surface. Darkening, blurring, or replacing the background with a solid or gradient color can dramatically improve the visual impact of portrait-style photos.
Best Photo Types for Tumblers
Certain photo types consistently produce better tumbler prints than others, and understanding these patterns helps customers select the best source images for their projects. Close-up portraits with clear facial features, good lighting, and simple backgrounds translate beautifully to tumbler surfaces. The subject's face should occupy at least 40 percent of the frame to ensure it is large enough to be recognizable on the curved surface. Full-body shots often result in very small faces on a tumbler, reducing emotional impact.
Pet photos work best when the animal is looking directly at the camera (or close to directly), is well-lit with natural light, and is against a contrasting background. Action shots of pets running or playing can produce great tumblers but require higher resolution because the motion often introduces slight blur. Landscape and travel photos are ideal for full-wrap panoramic layouts — look for images with a clear horizon line, vibrant colors, and interesting foreground-to-background depth.
Memorial photos and tribute tumblers often use vintage or older photographs that may have lower resolution than modern digital images. For these projects, scanning the original print at 600 DPI (or higher) with a flatbed scanner produces significantly better results than photographing the print with a phone camera. Scanned images maintain the original detail and can be color-corrected more accurately. Many photo enhancement tools offer specific restoration features that reduce grain, improve contrast, and remove scratches from scanned vintage photographs — making them suitable for high-quality in-memory drinkware production.
Ordering Photo Tumblers
With the photo prepared, cropped, and color-corrected, the ordering process is straightforward. Start by selecting the tumbler style and size in the RareCustom design tool, then upload the photo and position it using the on-screen template. The tool provides a 360-degree mockup preview that simulates how the finished tumbler will look from every angle — rotate the preview to check photo alignment, check for seam line issues on full-wrap designs, and verify that no critical elements are cut off by the lid area or base curve.
For single tumblers (gifts, personal use), simply approve the preview and proceed to checkout. For batch orders (family sets, event favors, memorial tributes), you can create multiple tumblers with different photos in a single order. Each tumbler can have a unique image while sharing the same tumbler style, size, and decoration method — ideal for creating a matching set of family photo tumblers with individual portraits or a set of pet photo tumblers for an office dog-lovers group.
Custom photo tumblers ship in protective packaging designed to prevent scratches during transit. Standard production takes 5 to 7 business days, with expedited options available for time-sensitive gifts. For complete pricing information including photo tumbler costs at various quantities, see the custom tumbler pricing guide. For design tips beyond photo preparation, the fonts, colors, and layouts guide covers typography, color palettes, and compositional strategies for mixed text-and-photo tumbler designs.
Create Your Photo Tumbler Now
Photo tumblers are one of the most personal, meaningful custom products you can create — and with the right source photo and a few minutes of preparation, the results are consistently impressive. Whether you are printing a single family portrait for a grandparent's birthday, a set of pet photo tumblers for holiday gifts, or a batch of landscape wraps for a vacation memory collection, the process is the same: choose a high-resolution photo, crop it for the tumbler's tapered surface, adjust color and contrast for the printing method, and preview the 360-degree mockup before ordering.
Browse the custom tumbler collection to see available styles and sizes for photo printing, or jump directly into the free online design tool to upload your first photo and preview how it will look on a finished tumbler. No minimum order quantities, free design tools, and protective shipping mean there is zero risk in creating your first personalized photo tumbler today.
Related Articles
Share this article
Written by
Priya Shankar
Customer Success Lead at RareCustom. CCXP certified with 6 years in education. Priya helps customers create perfect personalized photo tumblers for gifts and keepsakes.