Custom Photo Mugs: 10 Tips for Getting Perfect Prints Every Time
Get perfect photo mug prints with ten expert tips covering resolution, cropping, color correction, layout composition, and proofing. Create stunning personalized photo mugs that look exactly like the preview.
Jordan Reeves
Brand Experience Strategist at RareCustom. BFA in Graphic Design from Parsons School of Design with 8+ years helping brands craft visual identities. Specialist in color theory, layout composition, and design systems.
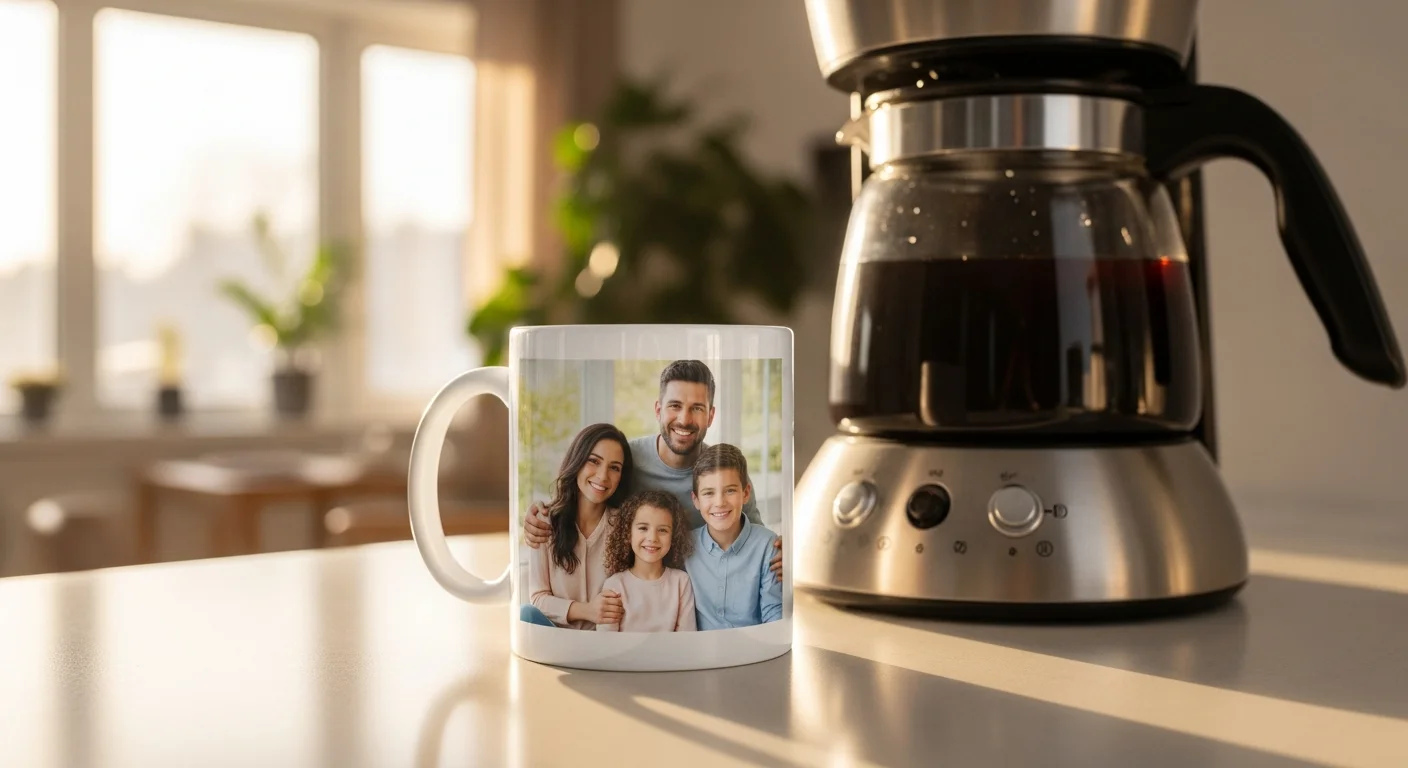
A custom photo mug is one of the most meaningful personalized gifts because it transforms an everyday object into a tangible memory — a wedding portrait that greets the couple every morning, a pet photo that brings a smile during a work break, or a family snapshot that keeps distant relatives close during the daily coffee ritual. But the emotional impact of a photo mug depends entirely on print quality. A blurry, discolored, or poorly cropped photo mug goes from heartfelt gift to disappointing mistake, which is why understanding the technical requirements of photo-to-mug printing is essential before uploading the first image.
This guide covers ten expert tips that address every aspect of creating photo mugs that match or exceed the on-screen preview — from the resolution requirements that prevent pixelation to the color correction techniques that ensure skin tones print accurately on ceramic. Whether the project is a single memorial mug for a grandparent, a set of 12 vacation photo mugs for family members, or a bulk order of team photos for a corporate event, these tips ensure professional-quality results every time. For readers new to custom mugs in general, the beginner's guide covers the broader design and ordering process.
Why Photo Mugs Make the Most Meaningful Gifts
Photo mugs consistently rank among the top three personalized gift categories alongside photo blankets and photo phone cases because they combine three elements that drive emotional value: personal imagery, daily utility, and physical permanence. A photo displayed on a digital screen competes with thousands of other images swiped past every day. The same photo printed on a ceramic mug becomes a singular, tangible object that occupies physical space in the recipient's daily routine — it sits on the nightstand, the kitchen counter, the office desk, demanding attention and evoking memory with every use.
The gift versatility of photo mugs spans every relationship and occasion: family portraits for grandparents on Mother's Day and Father's Day; pet portraits for animal lovers on birthdays; wedding photos for anniversary gifts; baby milestone photos for new parents; memorial photos for loved ones who have passed; travel photos from a shared vacation; team photos for coworkers. The relatively low price point ($12 to $18 for a single custom photo mug) makes them accessible for any budget while still carrying the emotional weight of a highly personal, one-of-a-kind gift. The holiday gift guide covers photo mug gift ideas organized by season and occasion.
Tip 1 — Use High-Resolution Photos (300 DPI Minimum)
Image resolution is the single most important factor in photo mug quality. The minimum recommended resolution is 300 DPI (dots per inch) at the final print size. For a standard 11-ounce mug, the print area is approximately 3.5 inches tall by 8 inches wide (for a full-wrap design) or 3.5 by 4 inches for a single-side print. At 300 DPI, a full-wrap design requires an image of at least 1,050 by 2,400 pixels, while a single-side print needs at least 1,050 by 1,200 pixels.
Modern smartphones easily exceed this requirement. An iPhone 14 captures images at 12 megapixels (4,032 by 3,024 pixels), which provides more than enough resolution for any mug print size. Samsung Galaxy S23 cameras capture at up to 200 megapixels. The problem arises when users send photos through messaging apps (WhatsApp, Facebook Messenger, iMessage in low-quality mode) that automatically compress images to reduce file size. A 12-megapixel original photo compressed to 200 kilobytes through a messaging app may drop to 800 by 600 pixels or lower — far below the 300 DPI threshold.
How to check photo resolution: On iPhone, open the photo in the Photos app, tap the info icon (the "i" in a circle), and check the pixel dimensions. On Android, open the photo in Gallery, tap the three-dot menu, select Details, and check the resolution. On a computer, right-click the image file, select Properties (Windows) or Get Info (Mac), and check the pixel dimensions. If the image is below 1,000 pixels on its shortest side, it may produce visible pixelation on a mug print.

Tip 2 — Understand the Print Area and Curvature
A mug is not a flat canvas — it is a cylinder with approximately 9.5 inches of circumference (for an 11-ounce mug), of which roughly 8 inches is printable after accounting for the handle attachment zone. The printable height is approximately 3.5 inches. This means the total print area is roughly 28 square inches for a full-wrap design, which is larger than many beginners expect but shaped very differently from the rectangular images most cameras produce.
The curvature of the mug surface creates visual distortion that affects how the print is perceived. Straight horizontal lines appear slightly curved when viewed from the front. Elements near the edges of the print (closest to the handle) appear to recede and compress compared to elements in the center of the front face. The RareCustom design tool provides a 3D mug preview that accurately simulates this curvature — always check the 3D preview rather than relying on the flat template view to assess how the final product will look.
Every mug template includes a safe zone (the area guaranteed to print cleanly) and a bleed zone (extra area beyond the trim line that accounts for minor alignment variations during production). Keep all critical elements — faces, text, and important design details — within the safe zone. Extend background colors and patterns into the bleed zone to prevent white edges from appearing if the print shifts slightly during application.

Tip 3 — Crop and Compose for the Mug Shape
Landscape-oriented photos work best for single-side mug prints because the horizontal format naturally fills the wide, short print area. A standard 4:3 or 16:9 landscape photo fits the mug print area with minimal cropping. Portrait-oriented photos (vertical) require significant cropping or scaling to fill the horizontal print area, which often cuts off important content at the top and bottom.
For full-wrap mugs, panoramic photos are ideal because they provide the wide aspect ratio needed to cover the entire circumference. Most smartphones have a panoramic shooting mode that captures ultra-wide images perfect for full-wrap mugs. Group photos, landscape scenery, and cityscape skylines work exceptionally well in the panoramic full-wrap format.
Center the subject in the front face of the mug (the area directly opposite the handle). When a person holds or views a mug, the front face is the primary viewing angle — any face, key text, or focal element should be positioned here. Use the rule of thirds as a starting guide, but adjust for the mug's cylindrical shape: the front-center is the "golden zone" where the eye naturally lands.

Tip 4 — Color Correct Before Uploading
Sublimation printing uses RGB color profiles, which is good news for photo mug creators because most digital cameras and smartphone cameras capture images in RGB. Submit photos in their original RGB format — do not convert to CMYK, which is used for commercial offset printing and will dull the colors when sublimated. The sublimation process produces the most vibrant results from sRGB or Adobe RGB source files.
Brightness and contrast adjustments are often necessary for optimal mug prints. The sublimation process tends to slightly deepen tones and increase saturation compared to the on-screen preview. Photos that appear slightly dark on screen will print even darker on ceramic. The recommended adjustment is to increase brightness by 5 to 10 percent and decrease saturation by 5 percent before uploading. This compensates for the tonal shift during the heat transfer process and produces prints that more closely match the screen preview.
Skin tones deserve special attention because they are the most noticeable element when a photo mug is used daily. The warm temperature of the sublimation process can shift skin tones slightly toward yellow or red. If the source photo already has warm lighting (golden hour, indoor tungsten), the shift may make skin tones look unnaturally orange. Counter this by applying a slight cool tone adjustment (reduce the warmth or add a small amount of blue to the white balance) before uploading. Preview the adjusted photo against a neutral gray background to verify natural skin tone appearance.
Tip 5 — Choose the Right Photo for the Format
Single-photo portraits work best on 11-ounce mugs with single-side printing. Close-up portraits with good lighting, a clean background, and a clear subject produce the most impactful results. Full-body shots tend to make the subject too small on the mug surface. Headshots and bust-level compositions maintain subject visibility and emotional connection at the mug's physical size.
Photo collages (3 to 6 photos arranged in a grid) work best on 15-ounce mugs or full-wrap 11-ounce mugs where the larger print area provides sufficient space for each photo to remain individually legible. Keep collage photos to a maximum of 6 images — more than that reduces each photo to a size too small to appreciate on a mug surface. Use consistent spacing between photos and consider adding thin borders to separate adjacent images.
Panoramic and landscape photos are ideal for full-wrap mugs. Beach sunsets, mountain ranges, city skylines, and group photos shot in landscape orientation wrap beautifully around the mug's circumference, creating an immersive visual experience where new details reveal themselves as the mug is rotated. Ensure the panoramic image has consistent exposure and color balance across its full width — panoramic stitching errors (visible seams, exposure shifts) become very apparent on a printed mug.

Tips 6 to 8 — Advanced Photo Mug Techniques
Tip 6: Background removal for clean compositions. Removing the background from a subject photo and placing it on a solid color or pattern creates a polished, professional look. Most modern smartphones offer built-in background removal (iPhone portrait mode, Samsung Galaxy object selection). For desktop editing, free tools like remove.bg handle background removal in seconds. Place the extracted subject on a complementary solid color that coordinates with the mug type — a white background works universally, while colored backgrounds can be matched to two-tone mug interiors for a cohesive design.
Tip 7: Adding text overlays with proper contrast. Combining text with photos on a mug requires careful attention to readability. Text placed directly over a busy photograph often becomes illegible due to insufficient contrast. Three solutions: add a semi-transparent dark overlay behind the text (50 to 70 percent opacity black rectangle), place text on a solid-color banner at the top or bottom of the design, or position text on a naturally empty area of the photo (clear sky, solid wall, out-of-focus background). Minimum text height of 0.25 inches at final print size ensures readability on the curved mug surface. For detailed typography guidance, see the fonts, colors, and layouts guide.
Tip 8: Creating photo collage layouts. For multi-photo designs, use a consistent grid structure with equal spacing between images. Common layouts include 2x2 grid (four photos), 3x1 strip (three horizontal photos in a row), 2x3 grid (six photos on a full-wrap), and filmstrip style (photos arranged in a horizontal strip with a border resembling 35mm film). Maintain at least 2 to 3 millimeters of spacing between adjacent photos to prevent visual blending, and consider adding a thin white or colored border around each photo for clean separation.
Tips 9 to 10 — Ordering and Quality Control
Tip 9: Always order a sample first for bulk orders. For orders of 10 or more identical photo mugs, investing $15 to $20 in a single sample mug is the most important quality control step. The sample reveals color accuracy that screen displays cannot precisely simulate — skin tones, background colors, and overall contrast all appear slightly different on ceramic compared to an LCD or OLED screen. The sample also shows how the design wraps around the curve, how text reads at the printed size, and how the handle position affects the visible design area. Approve the sample before committing to the full production run.
Tip 10: Check the proof carefully before approving. Every custom mug order includes a digital proof for review before production begins. Check the proof at 100 percent zoom for: spelling errors in any added text, photo orientation (not accidentally mirrored or rotated), cropping accuracy (no important elements cut off at edges), and overall color appearance. Pay particular attention to the area near the handle — ensure no critical design elements are hidden behind or adjacent to the handle where they will be difficult to see when the mug is held or displayed.
Best Occasions for Photo Mugs
Photo mugs align with gifting occasions throughout the year. Mother's Day and Father's Day are the peak seasons for photo mugs (3x to 4x normal volume), with family portraits, grandchildren photos, and sentimental messages being the most popular designs. Birthdays and anniversaries drive consistent year-round demand, especially milestone celebrations (30th, 50th, 25th anniversary). Pet memorials and celebrations have become one of the fastest-growing photo mug categories, with pet portrait mugs being popular for birthdays, adoption anniversaries, and memorial gifts. Graduation and retirement occasions call for commemorative photo mugs that capture the achievement moment. The complete holiday gift mug guide covers seasonal photo mug ideas for every major holiday throughout the year.

Create Your Custom Photo Mug
Creating a photo mug that matches or exceeds expectations starts with a high-resolution original photo, careful cropping for the mug's unique shape, and minor color corrections to compensate for the sublimation process. The free online design tool handles most of these adjustments automatically — upload a photo, position it on the mug template, add optional text, and preview the result on a 3D mockup before ordering. No minimums, no setup fees, and every mug is individually inspected before shipping. Browse the full custom mug collection to see available sizes, styles, and current pricing.
Frequently Asked Questions
What is the minimum photo resolution for a custom mug?
The minimum recommended resolution is 300 DPI at the final print size. For a standard 11-ounce mug single-side print, this means at least 1,050 by 1,200 pixels. For a full-wrap print, aim for at least 1,050 by 2,400 pixels. Most modern smartphone cameras capture images at 12 to 108 megapixels, which far exceeds the minimum. Avoid using photos that have been compressed through messaging apps.
Will my photo mug look exactly like the screen preview?
The printed mug will closely match the preview, but subtle differences are normal because screens emit light while ceramic reflects it. The sublimation process may slightly deepen tones and increase saturation. Increasing brightness by 5 to 10 percent before uploading compensates for this shift. For critical color accuracy, order a single sample mug before placing a bulk order.
Can I put different photos on different mugs in the same order?
Yes. Sublimation printing handles personalization at no additional per-design cost. Each mug in an order can feature a different photo, name, or message — the price per mug remains the same whether all mugs are identical or all mugs are unique. This makes sublimation ideal for personalized gifts, team photos, and events where each recipient gets a unique design.
Related Articles
Share this article
Written by
Jordan Reeves
Brand Experience Strategist at RareCustom. BFA in Graphic Design from Parsons School of Design with 8+ years helping brands craft visual identities. Specialist in color theory, layout composition, and design systems.